

Bentley Continental GTC - Protection Detail
- Mar 19, 2016
- 8 min read
The Bentley Continental GT was introduced to the luxury coupe market in 2003, the first generation featured a hefty 6.0L Twin Turbo W12 engine that could offer a surge of power whenever the driver saw fit. Many variants of the first generation were introduced alongside the Continental such as the Flying Spur, GT Diamond Series, GTC, GTZ and supersport to name a few. This caused even the most particular businessman to be spoilt for choice when looking for a luxurious vehicle. Later on Bentley released the updated generation two with the same wide hips, a little nip here and a little tuck there to bring the Continental right back upto date. 2011 saw the release of the second generation, being revealed in the Paris Motor Show of the previous year with the W12 engine remaining until 2013 when the 4.0L Twin Turbo V8 was an alternative option. The Continental GTC V8 landed in showrooms in 2012, one year after the GTC was put into production with the W12. The Bentley featured in this Protection Detail is equipped with the later 4.0L V8, with that said lets surge into the detail itself..
This Bentley GTC is a newly regular client who is a man of very little free time. He recently came in contact with us for a weekly maintenance schedule to ensure the vehicle is kept in the best condition. After a few Maintenance Details, it was advised that the owner looked into the Protection Detail as the paint was beginning to show signs of little protection being present. Gladly the owner didn't think twice and arranged for us to get the vehicle back to how it should be... The vehicle was handed to us in a very respectably clean condition, as the car had undergone a Maintenance Detail only a few days prior to this appointment a light layer of dust was all that needed to be washed down. The registration plates were carefully removed and placed to one side. Previous number plate sticky pads were still attached to the vehicle which would need to be removed later in the detail..


The wheels were liberally misted with Auto Finesse Iron Out to tackle the main build-up of break dust. This was left to dwell whilst the door, boot and bonnet shuts were cleansed with a diluted All Purpose Cleaner (APC) agitated with a boar's hair detailing brush. The Iron Out was allowed to dwell for approximately 3-5minutes before being thoroughly rinsed with a pressure washer. A strong stream of water allowed 90-95% of the brake dust build up to be removed without touching the wheels at all. The remaining brake dust was misted with Auto Finesse Imperial wheel cleaner and an assortment of wheel woollies and brushes were used to remove the stubborn dust. Reaching the barrels and rear of the spokes was made easy with various wheel woollies. Arches were sprayed with an APC and a long reach brush was used to lift road build up, a pressure rinse of both wheel and arch followed to remove the remaining dirt and dust..

The GTC was then blanketed in a layer of foam pre-wash making sure to avoid saturating the fabric roof with foam. Badges, nose grills and other intricate areas were agitated with a boar hair detailing brush whilst the foam softened and carried away loose dust and debris from the paint. After 2-5minutes, the foam was pressure rinsed thoroughly, ensuring the pressure washer did not contact the roof potentially striping the canvas. With the foam rinsed away, the GTC was then carefully cleansed of any remaining road soiling with a two bucket wash method. Auto Finesse Lather providing the necessary suds and a Microfiber Madness Incredimitt to wash each panel without marring or scratching the paint due to its deep-pile structure. Each panel was gently washed using no pressure and working only in straight parallel lines and rinsed immediately. This helps to prevent the shampoo solution from drying out on the panel in the sun. Once all panels were washed, another pressure rinse removed the shampoo solution and the car was moved out of the sunlight in order to be dried down ready for the decontamination stages.

The left over licence plate sticky pads were next. A few cotton pads were sprayed with a dedicated tar removing agent and was then applied to the sticky pad remains to cover as much surface area as possible. The pads would 'stick' to the area after being soaked meaning they could soak the pads without having to physically hold them in place. These pads were then left to soften the sticky pad glues whilst the rest of the tar spotting was taken care of. The car was then sprayed moderately with the tar remover directly onto the panels via a hand pump sprayer. A microfiber cloth misted with the same tar remover was then used to gently massage any tar spotting from the vehicle - most common places to find tar spotting would be lower/mid side panels and rear panels. Areas directly behind the wheel are often where the heaviest build up occurs. With the tar removed, the GTC was then liberally sprayed with Auto Finesse Iron Out fallout remover; once again the roof was avoided. The car was then left for the Iron Out to work on any ferrous particles that may be present on the paint. If there were any particles present the Iron Out would turn a deep purple shade to indicate where the chemical reactions were occurring. As the Bentley was a beautiful gloss black, these indications were difficult to see on the panels themselves..


With the pads remaining on the sticky pad remains through the fallout stage, it allowed more time for the tar remover to soften the glue enough that the stickies will almost wipe away cleanly. A few spots needed a gently massage with a microfiber misted with tar remover for complete (safe) removal. Moving the car back outdoors, the fallout remover was then thoroughly rinsed with a pressure washer to ensure no product remained. Like all our Detailing Services the vehicles undergo a third stage of decontamination to ensure there are no stubborn areas and all surfaces are as clean as possible. A surface preparation towel (clay bar alternative) allowed easy and rapid work of any contamination still present. Very little was made obvious, no harsh noises like sandpaper that are heard when a panel is contaminated. Simply smooth gliding with the odd area needing a little more attention. A second and final foaming was applied to the car, this time a heavily diluted mixture as there would be no need to aggressive cleaning - the panels are now clean, the purpose of this foaming is to carry any lifted contaminated away without the need to re-wash the vehicle...

A few minutes for the foam to work its way into gaps allowed it to push any fallout remover products out. This will prevent them dripping out later on in the detail as if they are left unnoticed they can be a little difficult to remove the trails once dried. A final pressure rinse, this time ensuring the body gaps and water traps are given extra attention left a bare and unprotected vehicle. At this point the hydrophobicity of the panels was reduced severely as there is now no protection to sheet the water away - it now clings to the surface. The final move indoors and the vehicle was dried down with a combination of drying towels and warm filtered air to force water from any areas that may cause drips. The gloss black paint was in pretty good condition, only minor swirling and the odd deep scratch but generally in great shape. Auto Finesse Tripple treated the paintwork by reducing the appearance of minor swirling and boosting the gloss. It also leaves a great base of which the wax can adhere to. Applied with a dual foam applicator pad the Tripple was worked in well to each section of panel using overlapping circular motions until the entire vehicle was treated. A fresh microfiber cloth was then used to buff the residue away leaving an almost perfect paint finish. Next stage for the body of the GTC was to lay down the first coat of wax. After a few considerations of what to apply, it was decided to opt for the Auto Finesse flagship wax Desire. Offering up to 6months+ durability and the capabilities to ensure the gloss black paint has pure depth and clarity.
Using a Waxmate applicator the Desire was spread thinly and evenly under lighting to ensure all areas were waxed. Overlapping circular motions with no pressure spread the Desire perfectly over the entire car. As directed, the wax was then left to cure for 10 minutes before it was gently buffed away and the painted surfaces would need to be left for a minimum of one hour after the removal of the first wax coat. This allows any secondary hazing of any thicker areas to cure properly. During this time we carried on with the rest of the detail. The wheels were given a spritz of quick detailer to remove any water spotting and dust. The owner mentioned to us previously that the wheels were looking a little dull. The issue that we found under our lighting was that the black painted areas of the wheels were heavily marred. To reduce this marring and restore some colour, the wheel faces were polished by hand with Auto Finesse Tripple. Once buffed, Auto Finesse Mint Rims wheel wax was then applied thinly to each wheel and left to cure. After the Mint Rims had cured adequately, the residue was buffed away to reveal an enhanced gloss that complemented the body perfectly. After the Mint Rims was buffed away, the wheels have a much smoother feeling when buffing them with a microfiber (which is strangely satisfying!). The tyres were then dressed to a high satin finish using Gyeon q2TIRE and the arch liners were misted with Auto Finesse Dressle...


The GTC's glass was hydrophobic from the factory meaning that the glass sealant would be boosting the performance. For this, OCD Finish Hydro Shield was misted onto the glass (including rear glass screen) and spread with a microfiber. This was left to cure until the product had almost disappeared, a gentle buff was all that was needed to remove the excess product and leave a perfectly streak-free finish. There were very little areas that were bare-plastic finish on the GTC. Amongst the gloss trim, carbon fibre or chrome the only plastic trim was the lower bumper grills and air ducks located behind. For this Dressle comes into its own making these grill fast and simple to protect and as its water-based, any overspray can be effortlessly buffed away with no greasy patching. At this point he second layer of Desire was ready to be applied. A circular overlapping motion spread the wax evenly and thinly just as the first was, artificial lighting helped to see the coverage. Ten minutes to cure and the wax wax buffed away revealing a stunning deep gloss from the flat Bentley paint...

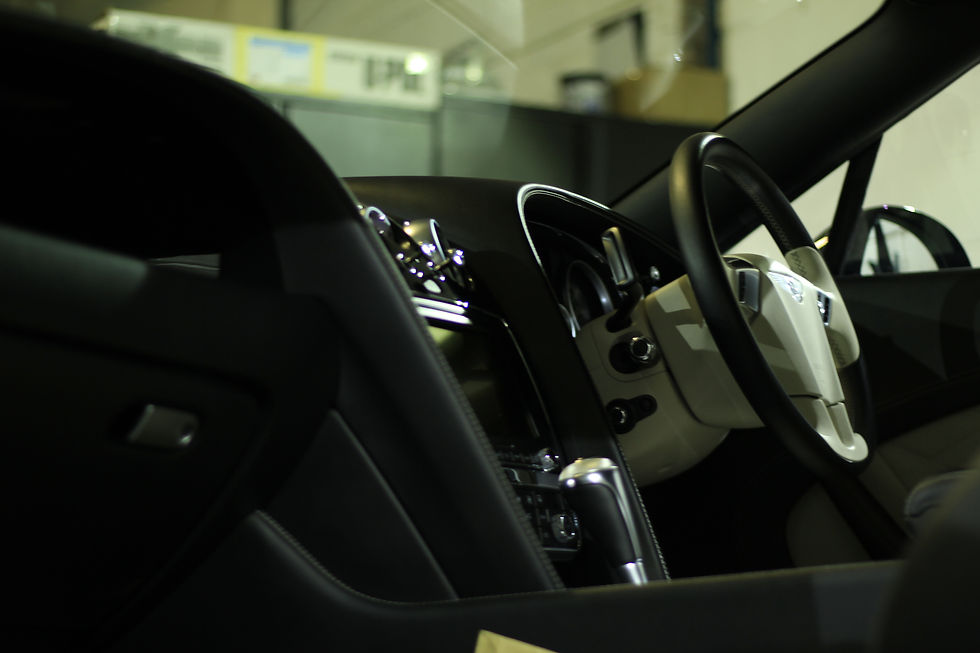
With the exterior almost completed and needing one final buff, it was time to move onto the minor interior detail that is inclusive of the Protection Detail (and any of our details for that matter). The interior was given a thorough vacuum of light dusting and crumbs, with vehicle being kept in very good condition by the owner little vacuuming was needed. All interior trim surfaces were wiped free of dust with a microfiber misted with Auto Finesse Dressle as it leaves a beautiful satin finish on interiors. It's one of our favourite products on dashboards and the like. Interior glass was misted with Auto Finesse Crystal and buffed to a perfectly streak-free finish effortlessly.
The leather on the driver’s seat had a light-medium amount of denim transfer; we took it upon ourselves to reduce this so a diluted leather-safe interior cleaner was misted into a soft bristle leather brush and worked in thoroughly. A few gentle scrubs were enough to lift the dye and a wipe away with a microfiber removed it from the leather completely...


To complete the Bentley's Protection Detail, a final buff with Auto Finesse Finale quick detailer removed any remaining wax traces and also helps to prolong the life of the wax minutely. Buffing the vehicle to a perfect smear-free finish and the door shuts being wiped down with Finale completed the detail for this absolutely beautiful executive Coupe Cabriolet. The final Piece..


Comments